Table of Contents
If you’ve ever tried to animate a character from a single photo, you already know the problem: most tools either scramble the face or they drift away from the original look after a few seconds. AnimateImage is built to tackle that head-on—upload a character image (or a few), and it generates a smooth animated video while keeping the identity more consistent than you’d expect.
In my experience, it’s one of those tools that feels “easy” without being totally dumbed down. I used it in a couple different ways (story-style motion vs. more tutorial/product-ish framing) and I could get something usable fast. The real question is: does it actually hold up when you push it a bit? Keep reading—I’ll show you what I generated, what settings I used, and where it stumbled.
AnimateImage Review: What I Got From Real Character Inputs
I’m going to be straight with you: AnimateImage is at its best when your input images are clear and consistent. That means good lighting, the face not hidden, and the character looking roughly the same way across images. If you throw in one blurry shot and one weirdly angled selfie, the results won’t be magic.
Here’s how my testing went.
My setup (so you know what I’m comparing)
- Inputs: character photos in different poses (front-facing + slight angle)
- Number of images: I used 2 images first, then 3 images to see if it improved stability
- Goal: short looping-style motion that keeps the same identity (not a full cinematic production)
- Time-to-first-result: fast enough that I could iterate a few times in one sitting (minutes, not hours)
Mini case study #1: “Character intro” style motion
For this run, I uploaded two images: one straight-on, one with a slight head turn. I kept the background fairly simple (not a busy street scene). The output felt natural overall—like the character was “moving” rather than being re-drawn from scratch.
What I noticed: the face stayed recognizable through the clip, and the expression didn’t randomly flip. The movement wasn’t robotic, but it also wasn’t perfect motion-capture. Think “good enough to use,” not “Pixar-level animation.”
Mini case study #2: “Tutorial / product demo” framing
Next, I tried a more “explainer” vibe: a pose with the head slightly raised and shoulders angled (basically, something that reads well when you’re presenting information). I uploaded three images instead of two.
What changed with 3 images: the character’s identity held up better across the whole sequence. I also saw fewer moments where the face looked like it was trying to “reconcile” conflicting reference angles. In other words, the extra pose helped the model stay anchored.
Mini case study #3: When it didn’t work perfectly
This is the part people skip, so I’ll include it. I tested a set where one image was slightly darker and the eyes weren’t as sharp. The output still animated, but I noticed a few issues:
- Face detail softness: not a deal-breaker, but it reduced “crispness”
- Occasional drift: subtle changes in facial proportions across frames
- Less consistent expression: the mouth/cheeks looked a bit less stable than in the better-lit runs
So yeah—it’s not a “no matter what you upload” tool. Garbage in, you know the rest.
How hard is it to use?
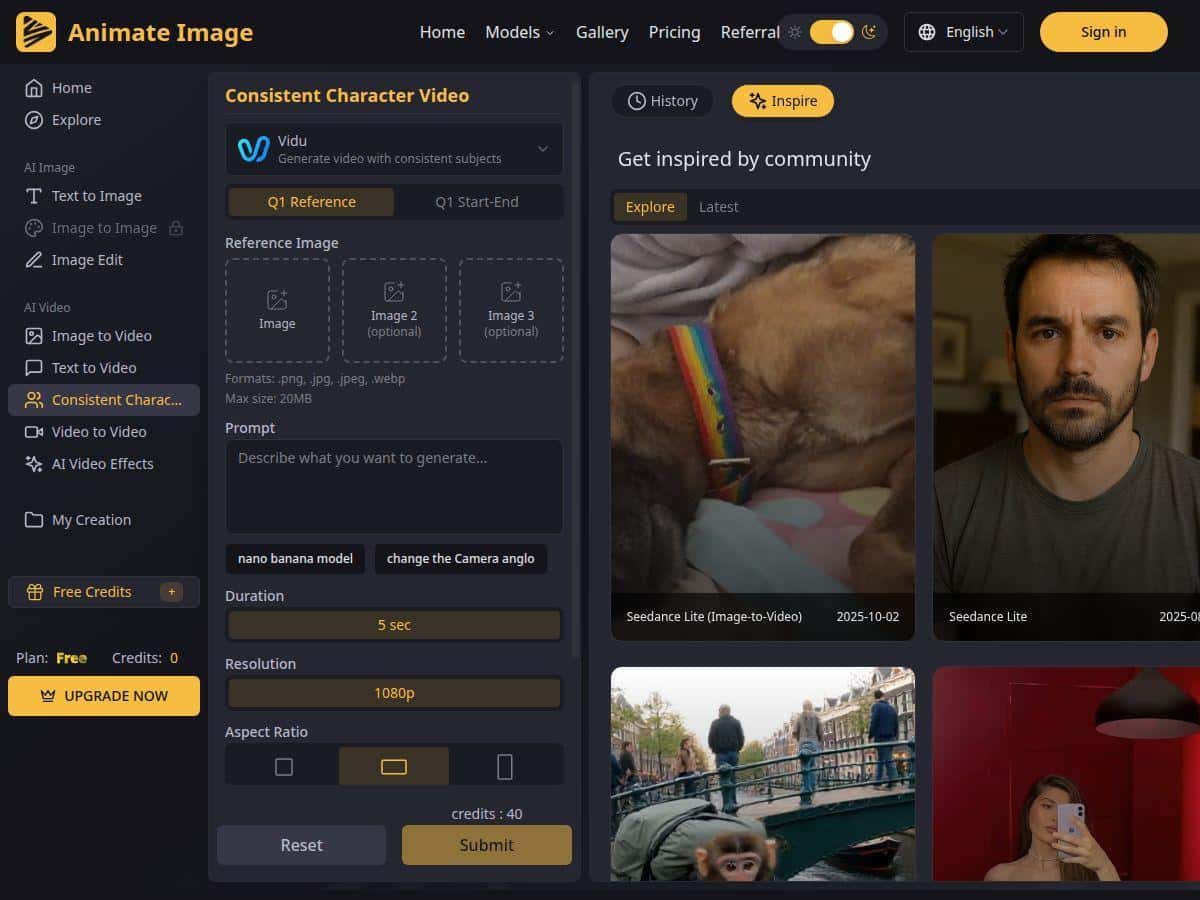
The workflow is straightforward: you upload your images, pick the generation options, and hit generate. I didn’t have to do manual cleanup or keyframe editing (which is honestly the main reason I kept using it). The interface is clean, and the steps feel designed for people who don’t want to spend a weekend learning animation software.
One thing I’d recommend: don’t just generate once and call it done. I re-ran the same idea a couple times, and small differences in pose clarity made a noticeable impact. If you want the “best” output, quick iteration is part of the process.
How it compares (quick reality check)
I’ve also used other image-to-video tools that can be fun, but they often struggle with identity consistency—especially when the clip is longer than a few seconds. AnimateImage feels more focused on keeping the character recognizable, and that’s the difference I cared about most.
That said, if your priority is full control (exact camera movement, precise facial acting, or hand/limb control), you’ll likely find AnimateImage limiting. It’s built for quick, consistent character animation—not for frame-by-frame direction.
Key Features That Matter (Not Just Marketing Bullets)
- Upload up to three images of your character in different poses
This is a big deal in practice. When I used 3 images, the character felt more stable across the generated motion than when I only used 2. - Facial recognition + consistency
In my runs, the face stayed “the same person” across frames more reliably than I’ve seen with tools that don’t anchor identity as aggressively. - Smooth transitions and natural movement
The motion reads fluid at a glance. It’s not always perfect micro-motion, but it looks convincing in a short clip. - Supports different scenarios (tutorials, product demos, etc.)
I didn’t test every category equally, but the outputs worked best when the pose/background matched the vibe you’re going for. - Personal and commercial projects
If you’re making assets for clients or marketing, this matters. Just make sure you’re following the platform’s licensing terms for your exact use case. - Restyle/customize while maintaining identity
This is where it gets interesting: you can change the look without fully losing the character. I found it works better when your original images already have clear facial structure and consistent lighting.
Pros and Cons From My Experience
Pros
- Better character consistency than many generic tools: the identity stayed recognizable across the clip.
- Fast and beginner-friendly: upload, adjust, generate—no complicated editing steps.
- Works well for short-form content: character intros and quick story segments are the sweet spot.
- Less production overhead: fewer steps than traditional animation workflows.
- Useful for both personal and commercial use: as long as you follow the platform’s terms.
Cons
- Input quality really matters: blurry, low-light, or inconsistent reference shots reduce stability.
- Customization is limited: you can’t fully dictate every aspect of motion like you could with more advanced animation tools.
- You may need to experiment: I had to re-run a couple times to get the best “face stability” and expression consistency.
Pricing Plans (Credits, Free Trial, and What to Watch For)
AnimateImage offers a free trial to get started. After that, you’ll need a paid plan to unlock more output capacity.
What I like about the pricing model is that it’s based around credits and resolution/output limits—so you’re not stuck paying for a bunch of features you won’t use.
- Free trial: enough to test the workflow and see if your character inputs produce good results.
- Paid plans: typically include more credits and higher-resolution options.
- Credits: you can usually earn credits through activities or purchase them directly (the exact options can vary over time).
Quick tip: if you’re serious about getting consistent results, don’t burn all your credits on the first idea. Try 1–2 “safe” inputs first (clear lighting, front-facing), then scale up once you know the model behaves well with your style.
Wrap up
AnimateImage is a solid choice if you want to turn character photos into animated videos without turning it into a full production project. The biggest win for me was that it keeps character identity more consistently than a lot of general image-to-video tools. When your inputs are clear and you use up to three poses, the results look polished enough for intros, quick storytelling, and marketing clips.
Just don’t expect total control. If you need precise camera choreography or highly customized acting, you’ll hit limits. But if your goal is “upload images → get a usable animated character quickly,” this one delivers.
If you’re on the fence, try the free trial, run two versions (2 images vs. 3 images), and compare how stable the face looks across the clip. That comparison alone will tell you whether AnimateImage is a fit for your content.