Table of Contents
There’s a moment every book-maker eventually hits: you’ve got your cover laid out, you think you’ve nailed the spine width… and then the book comes back looking like it belongs to a different universe. I still remember my first “almost right” print run—perfect binding, 5.5x8.5 trim, and a cover template that was off just enough to make the spine cover bow slightly at the edges. The worst part? The math wasn’t wildly wrong. It was wrong in the one way that matters: I assumed the paper thickness from a weight label instead of using a measured caliper reading for that exact stock.
Spine sizing is one of those topics where the basics are simple, but the details are what separate a clean, professional finish from a cover that doesn’t quite sit right. So let’s fix that. I’ll show you how to calculate book binding and spine size for real-world binding types, how to convert paper specs into thickness you can trust, and how to build in the small allowances that keep your cover from fighting you during finishing.
Key Takeaways
- Spine width comes from total book block thickness, which depends on page count, paper thickness, and the way your binding folds/joins signatures.
- Don’t rely on “gsm → mm” guesses. If you can, measure thickness with a caliper (or use the printer’s spec). Paper weight alone can mislead you.
- Use the right formula for your binding type: perfect binding is not the same math as saddle stitch or case binding.
- Include practical allowances for glue build-up, rounding/creep, and cover fit—usually a small extra margin in your spine cover design.
- Design your spine area with safe text spacing so trimming and spine rounding don’t cut into important elements.
- Adhesive choice affects thickness tolerances (especially with thick papers or heavy glue lines), so test with a sample copy.
- Run a quick proof print and measure the actual block thickness before committing to the full run—this is where the “oops” gets prevented.
1. How to Calculate Your Book’s Spine Size
Spine size is basically the thickness of the book block along the binding edge. If you get that number wrong, your spine cover can end up too tight (hard to close, ugly bowing) or too loose (wrinkling, gaps at the edges).
In my experience, the spine width calculation is only “hard” because people mix up pages vs sheets and paper weight vs actual thickness. Let’s clear that up first.
2. Use Online Spine Width Calculators (but verify assumptions)
Online calculators can be a great shortcut—especially if you’re dealing with common formats and standard binding types. Usually they ask for your trim size, page count, and paper weight, then they apply an internal thickness model.
That said, I always treat these as a starting point. If you have access to your printer’s paper thickness spec (or can measure), you’ll get a more reliable result. If you’re looking for tools to speed up the first pass, you can check out these handy online tools for calculating spine widths.
Here’s what I look for when I use a calculator: does it ask for paper thickness in mm or only gsm? Does it assume double-sided printing? Does it include an allowance for glue/spine rounding? If the answers aren’t clear, I switch to the manual method below.
3. Manual spine width math (the assumptions matter)
The basic idea is simple: spine width ≈ total paper stack thickness + binding build-up.
But the “paper stack thickness” depends on whether your page count is counted as pages (front+back) (typical for print specs) or sheets (a sheet has two pages).
So before you calculate, define these:
- Page count (P): total pages in the finished book (front/back both counted).
- Paper thickness (t): thickness of one sheet (single sheet), in mm.
- Sheets (S): typically S = P / 2 for standard duplex printing.
- Binding allowance (A): extra mm for glue line, trimming/rounding effects, and any spine cover fit tolerance.
4. Perfect binding example (step-by-step with realistic inputs)
Perfect binding is where you glue the folded/stacked pages to the spine. In many workflows, the “paper stack thickness” is dominated by the number of sheets in the book block, plus a small glue build-up.
Worked example:
- Trim size: 5.5 x 8.5 in (doesn’t change thickness math, but it matters for cover layout)
- Page count (P): 300 pages
- Binding: perfect binding
- Paper thickness (t): measured sheet thickness = 0.10 mm per sheet (I’m using 0.10 mm as an example value—don’t assume gsm equals this)
- Sheets (S): 300 / 2 = 150 sheets
- Glue/spine build-up allowance (A): 2.0 mm total allowance for fit (this is a practical starting point; your printer may recommend different tolerances)
Math:
Block thickness = S × t = 150 × 0.10 mm = 15.0 mm
Spine width estimate = Block thickness + A = 15.0 mm + 2.0 mm = 17.0 mm
What I noticed when I did this for a real run: the biggest improvement wasn’t the formula—it was measuring thickness for that exact paper. Two papers with the same gsm can behave differently once they’re cut, stacked, and pressed.
5. Saddle stitch example (different geometry, different math)
Saddle stitch is when pages are folded into signatures and stapled through the fold. The “spine” is basically the folded edge, so you don’t treat it like perfect binding.
For rough sizing (cover wrap or spine strip design), I usually estimate the block thickness from sheets, then add a small tolerance for the fold and finishing.
Worked example:
- Page count (P): 64 pages
- Binding: saddle stitch
- Paper thickness (t): measured = 0.085 mm per sheet
- Sheets (S): 64 / 2 = 32 sheets
- Fold/finish allowance (A): 0.8 mm (practical starting point)
Math:
Block thickness ≈ S × t = 32 × 0.085 mm = 2.72 mm
Spine/edge width estimate ≈ Block thickness + A = 2.72 mm + 0.8 mm = 3.52 mm
One more thing: if you’re designing a spine cover for saddle stitch (like a wraparound cover), you’re often not using the same “spine cover” template logic as perfect binding. If your printer provides a cover template, use their specs.
6. Convert paper specs safely: gsm isn’t a thickness guarantee
You’ll see rules of thumb online like “80gsm is ~0.1mm,” but that’s not reliable across brands, coatings, and paper types. In my own testing, the same gsm label has produced different caliper readings depending on manufacturer and whether the paper is coated/uncoated.
Here’s what I recommend instead:
- Best: use the printer’s paper technical sheet (often includes caliper in microns or mm).
- Good: measure a stack of 10–50 sheets with a caliper, then divide by the number of sheets.
- Only if you must: use gsm-to-thickness estimates, but treat results as “ballpark” until you verify.
Quick measurement tip: stack the sheets flat, close the caliper gently (don’t compress), measure thickness of the stack, then calculate t = stack_thickness / number_of_sheets.
7. A quick reference table for common spine builds (ballpark)
This table uses the same basic idea (sheets × thickness) with a typical measured sheet thickness range. It’s meant to help you sanity-check your calculator output—not replace actual measurement.
- Assumed sheet thickness: 0.08–0.12 mm
- Assumed binding allowance: +1.5 to +2.5 mm (perfect binding only)
Ballpark spine width (perfect binding):
- 100 pages (≈50 sheets):
- Paper 0.08 mm → block 4.0 mm → spine ≈ 5.5–6.5 mm
- Paper 0.10 mm → block 5.0 mm → spine ≈ 6.5–7.5 mm
- Paper 0.12 mm → block 6.0 mm → spine ≈ 7.5–8.5 mm
- 200 pages (≈100 sheets):
- Paper 0.08 mm → block 8.0 mm → spine ≈ 9.5–10.5 mm
- Paper 0.10 mm → block 10.0 mm → spine ≈ 11.5–12.5 mm
- Paper 0.12 mm → block 12.0 mm → spine ≈ 13.5–14.5 mm
- 300 pages (≈150 sheets):
- Paper 0.08 mm → block 12.0 mm → spine ≈ 13.5–14.5 mm
- Paper 0.10 mm → block 15.0 mm → spine ≈ 16.5–17.5 mm
- Paper 0.12 mm → block 18.0 mm → spine ≈ 19.5–20.5 mm
If your spine estimate lands way outside these ranges, it’s usually because the paper thickness assumption is off—or because the binding type isn’t what you thought it was.
8. Account for bleed, trim, and spine cover safe zones
Bleed and trim margins don’t directly change the block thickness, but they absolutely affect whether your spine text survives the finishing process.
My approach is simple:
- Use the printer’s bleed spec (common is 3 mm or 0.125 in, but don’t guess).
- Place spine text and logos in a safe zone (often 5–7 mm from the spine edges on the cover template).
- If your spine cover is narrow and your title is long, I’ll usually bump font size slightly and shorten tracking—tight spines are where typography gets ugly fast.
And yes, adding a tiny fit tolerance (like 0.5–1.0 mm) to your spine cover design can save you from minor rounding differences. That’s not “extra”—that’s practical.
9. Single-sided vs double-sided pages (where people get tripped up)
When print shops list page count, it’s usually total pages (front+back). That’s why duplex printing typically means S = P / 2.
If your project is truly single-sided, then each page is one sheet side, meaning the number of sheets is closer to S ≈ P (or you’ll need the printer’s imposition details).
Rule of thumb: if your page count includes both sides, use P/2 for sheets. If it’s literally one side per page, don’t divide by 2.
7. Adhesives and material choices that actually affect spine fit
I’m going to skip the generic market-size fluff here, because it doesn’t help you size a spine. What matters for your calculation is how adhesives and cover materials change the final build.
Here are the practical ways “material trends” show up in real spine outcomes:
- Glue build-up thickness: different adhesives (and different glue application settings) can change the glue line thickness by a noticeable fraction of a millimeter.
- Flex and creep: some adhesives dry with more flexibility, which can slightly change how the spine cover sits over time.
- Cover board compression: thicker cover materials can compress when the book is cased/covered, effectively changing your final spine width.
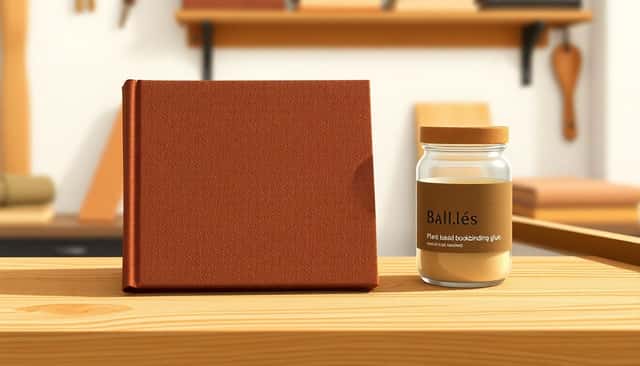
If you want a deeper look at eco-friendly adhesive options (and how they compare in practice), you can use this reference: this guide to eco-friendly bookbinding glues.
8. Machines and automation: why consistency matters for spine width
Automation doesn’t magically fix bad math—but it does reduce variation. And variation is what causes “my template was right, but the final book isn’t.”
When a binder uses consistent pressing, cutting, and glue application, you get:
- Less spread in glue line thickness
- More repeatable trimming, which helps your spine cover alignment
- More consistent compression/stacking, which affects block thickness
If you’re comparing equipment or binder workflows for your project size, it can be useful to look at options like compact perfect binders—especially if you’re doing small runs and want predictable results.
9. What to watch for with adhesives and materials (from a spine-sizing perspective)
New adhesive formulations and materials are mostly about performance: stronger bond, better flexibility, and easier cleanup. But for spine sizing, the key is whether the adhesive changes the thickness build or the timing of drying/pressing.
- Stronger bonding: lets binders use more consistent glue application without overcompensating.
- Improved flexibility: can reduce cracking on the spine over time—especially for thicker papers.
- Eco-focused materials: can be great, but always confirm compatibility with your paper and binding method.
If you’re trying to compare options, this page collects resources you can use to cross-check adhesive choices: the latest market reports.
10. Practical tips for choosing adhesive (and keeping spine thickness under control)
Adhesive choice can change how your book behaves during finishing, so I treat it as part of the spine sizing equation—not an afterthought.
- Match glue to binding style: PVA is common for flexible builds; hot melt is faster but can behave differently with certain papers.
- Watch drying/press time: if a binder presses longer or differently, the stack compression can change your measured thickness.
- Test a sample with your exact paper: I usually print 1–3 sample copies, measure block thickness at the spine edge, and compare to my estimate. If I’m off by more than ~0.5–1.0 mm, I adjust the cover spine width and/or allowance.
- Consider archival needs: if the book matters long-term, look for pH-neutral/acid-free options when appropriate.
- Plan for tolerance: if your spine cover is printed at the exact calculated width with no allowance, you’ll feel every tiny variation. I prefer adding a small tolerance rather than hoping everything lands perfectly.
And yes—always follow the manufacturer’s instructions. Not because it’s “nice,” but because the glue instructions often assume a specific paper thickness and application method.
11. Final thoughts on sizing the spine (so your cover actually fits)
Here’s the truth: spine sizing isn’t just about formulas. It’s about aligning four things—paper thickness, page/sheet count, binding method, and finishing tolerance.
Before you send your final files, I recommend this checklist:
- Confirm binding type (perfect vs case vs saddle stitch). The formula changes.
- Use measured paper thickness if possible (caliper wins over gsm guesses).
- Confirm page count meaning (pages vs sheets; double-sided vs single-sided).
- Add an allowance for glue build-up and fit (especially for perfect binding).
- Do a proof if the run is anything more than tiny—then measure the actual block thickness.
If you’re unsure, ask your printer/binder for their preferred spine calculation method or template spec. That one question can save you a full remake.
FAQs
Start with the book block thickness: spine ≈ (sheets × paper thickness) + binding/fit allowance. For typical duplex page counts, sheets are usually P/2. Then add a small allowance for glue build-up and cover fit based on your binding type.
Microns to mm is easy: 1 micron = 0.001 mm. If your paper spec says 90 microns, that’s 0.090 mm per sheet. Then use your sheet count (often P/2 for duplex) and apply spine ≈ (sheets × t) + allowance.
There isn’t one universal number, but for perfect binding I often start with +1.5 to +2.5 mm total allowance (glue build-up + fit tolerance). If your paper is thick or your binder applies heavier glue, you may need more. The best way to dial this in is a 1–3 copy test where you measure the actual spine/block thickness.
Perfect binding is mainly about glue line thickness on the spine edge, so your calculation uses block thickness plus a glue/fit allowance. Case binding involves additional components (case boards, lining, and often different covering behavior), so the spine “cover” fit can differ. In practice, case binding is more template-driven: use the binder’s spine width/template spec and confirm with a sample because the cover system affects final thickness.
No. The “divide by two” step converts pages to sheets for typical duplex printing where each sheet contains two pages. If your file/page count is single-sided (or your printer defines it differently), you’ll need the printer’s sheet count or imposition details.