Table of Contents
Honestly, I used to think brand photoshoots were “figure it out on the day” projects. Then I started planning shoots for creators and small brands—everything from cozy lifestyle sessions in home studios to more polished content days in rented spaces—and I noticed the same thing over and over: the stress doesn’t come from the camera. It comes from not knowing what to prepare.
So if you’re a creator trying to level up your visual brand (Instagram, TikTok, your website, product pages—whatever you’re building), this checklist is the exact structure I use to keep shoots calm and consistent. I’ll walk you through defining your look, building a shot list, getting your outfits and props ready, nailing lighting, and finishing with an editing/export workflow you can actually repeat.
Key Takeaways
- Start with a clear visual identity: 3–5 brand “anchors” (colors, vibe words, lighting style, wardrobe tone) so your photos look like they belong to one brand.
- Build a detailed shot list with priorities (Must-have / Nice-to-have) and group shots by location/scene so you don’t waste time hunting for setups.
- Pick 2–3 outfits that match your brand palette and style. In my experience, solid colors and simple silhouettes photograph more consistently than trendy patterns.
- Bring 2–3 props that support your story (tools, product, branded accessory). Keep them clean and minimal—clutter reads as “messy,” not “authentic.”
- Choose a location with at least one clean background and one flexible “working” area. Prepare 1–2 backgrounds so you get variety without chaos.
- Grooming matters more than people think: pack touch-up basics (powder, blotting sheets, a lint roller, hair ties) so small issues don’t derail momentum.
- Confirm logistics early: schedule, address, parking/loading, release forms (if needed), and how you’ll use the photos afterward.
- Plan lighting and framing intentionally. Soft light (window light or diffusion) beats harsh overhead light almost every time.
- Use a repeatable editing workflow. I recommend a 10–15 minute “batch pass” first, then refine only the hero shots.
- Post strategically: crop for platform formats (stories/reels, square/portrait posts, website hero images) and include BTS shots to build trust.
- Track results after publishing. Look at saves, shares, CTR, and comments—not just likes—then adjust your next shot list based on what performed.

Creator Brand Photoshoot Checklist
If you’re a creator trying to boost your brand with eye-catching visuals, a photoshoot isn’t just “nice to have.” It’s how people recognize you fast—and decide if they trust you. Visual content is a big part of marketing strategy; HubSpot (2024) and MDG Advertising (2024) both point to strong influence from product and visual imagery.
But here’s the real trick: the best photos usually come from preparation, not luck. Use this checklist and you’ll walk into your shoot knowing exactly what to capture, how to capture it, and what to do with the photos afterward.
1. Define Your Brand’s Visual Identity and Goals
Before I touch a camera (or even pick outfits), I get super clear on what my brand should feel like. Is your vibe calm and premium? Bright and playful? Editorial and bold? Pick a lane—or at least pick two complementary lanes.
Then I write down:
- Audience: Who are you trying to attract? (Busy moms? SaaS buyers? Fitness clients?)
- Promise: What should people believe after seeing your photos? Trust, creativity, expertise, warmth?
- Visual anchors: 3–5 consistent elements (example: “cream background,” “clean typography overlays,” “sage + white palette,” “soft window light,” “minimal props”).
Consistency matters. Brands with consistent visuals can see up to 80% higher recognition (Lucidpress, 2024). I like to decide what “consistency” means in real terms: skin tones shouldn’t swing green/orange, your wardrobe colors shouldn’t clash, and your backgrounds should repeat enough that your feed feels connected.
Finally, decide what image types you need. Do you want headshots for credibility? Lifestyle shots for relatability? Product images for conversion? Behind-the-scenes shots for trust? If you don’t choose, your photographer will—usually in whatever direction they think is fastest. And that’s how you end up with “pretty photos” that don’t serve your goals.
2. Make a Detailed Shot List
A shot list is where you turn “I want content” into “I have the exact images I need.” I always build mine in three layers: Must-have, Should-have, and Nice-to-have. It keeps the day flexible without sacrificing essentials.
Here’s a shot list example I’d use for a creator who sells a digital product and teaches online:
- Must-have (10–12 shots): front-facing headshot (neutral background), 2 lifestyle portraits (hands visible, relaxed smile), 1 “talking to camera” mid-shot, 2 workspace shots (laptop + notes), 2 product/prop close-ups (hands holding product), 1 hero branded image (you + prop), 1 low-angle detail (hands/keyboard/pen), 2 BTS trust shots
- Should-have (6–8 shots): profile shot, seated version of hero, “laugh” candid moment, outfit detail close-up, b-roll of you packing orders
- Nice-to-have (3–5 shots): dramatic shadow shot, outdoor wide shot, “before/after” editing angle, extra prop variation
Organize by location or scene so the photographer doesn’t constantly reset. For instance: “Scene A = window light portraits,” “Scene B = desk/workspace,” “Scene C = product flat-lays.”
And yes—share it ahead of time. It saves time, but more importantly, it prevents the awkward moment where you realize you didn’t get a single image you can use on your homepage.
3. Select Outfits That Match Your Brand
I recommend picking 2–3 outfits max for most creator shoots. More than that usually turns into time pressure and half-finished looks.
When I choose outfits, I think about two things: color and texture. Solid colors are your friend. Busy patterns can create visual noise, and some prints can even moiré on camera.
Quick outfit rules I actually follow:
- Pick one “hero” color that matches your brand palette (example: navy + cream for a premium vibe).
- Use one neutral (white, cream, black, charcoal) so you have flexibility for editing and backgrounds.
- Add one contrast piece (like a rust sweater or emerald accessory) to create variety without looking random.
Also: comfort is non-negotiable. If you’re uncomfortable, your posture changes. And posture is what people notice first. If you’re not confident in what you’re wearing, the photos will show it.
4. Gather Props to Support Your Story
Props should support your message, not compete with you. I keep a simple rule: 2–3 props max per scene, and each prop needs a job.
Examples of “prop jobs” that consistently work:
- Authority: books, certifications, laptop with open project, planner with visible notes
- Relatability: mug, headphones, hoodie, keys, a “real life” item that looks lived-in (not dusty)
- Brand identity: branded notebook, product packaging, signature color accessories
Before the shoot, clean everything. Wipe fingerprints off packaging. Check for scratches on devices. Make sure props look intentional from 3 feet away—because that’s how people view your feed.
5. Choose Your Shooting Location
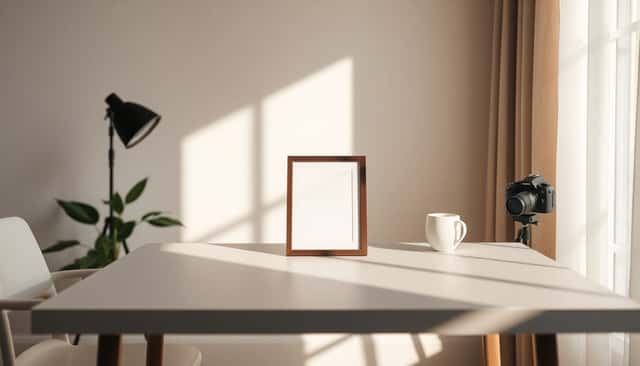
Location is basically your “background editor.” You can fix lighting in post, but you can’t always fix a messy wall.
In my experience, a great creator location has:
- One clean background: a plain wall, curtain, or simple backdrop
- One working area: desk/table space for lifestyle and content shots
- Space to reset: enough room to move between setups without bumping into everything
If you shoot indoors, I like using window light whenever possible. If you shoot outdoors, watch for harsh midday sun. Early morning and late afternoon give softer shadows and more flattering skin tones.
Also, plan your backgrounds ahead of time. Even if you only bring one backdrop, you can create variety by moving it 3–6 feet behind you, or by switching between “close” and “far” distances.
6. Prepare Your Beauty and Grooming
Grooming isn’t about looking “extra.” It’s about looking consistent in every shot. Under studio lighting (or even bright window light), small things show up fast.
What I pack for touch-ups (because you’ll thank yourself later):
- powder or blotting sheets (especially if you’re shiny)
- lint roller (clothes + props pick up dust)
- hair ties + a small comb/brush
- lip balm (for dry lips—also helps you avoid that cracked look)
- nail buffer or quick wipe (for clean edges)
If you wear makeup, keep it natural but camera-ready. Think “fresh” not “heavy.” And if you can hire a makeup artist, do it—especially if you’re doing multiple looks. If not, practice your routine once under similar lighting to your shoot so you know what changes.
7. Confirm Logistics and Final Details
This is where shoots either feel smooth or chaotic. Before the day, confirm everything that can create delays.
I usually double-check:
- Time buffer: arrive 15–30 minutes early for wardrobe + test shots
- Permissions: if you’re using a studio, get the rules in writing (shoot duration, equipment restrictions)
- Gear plan: what your photographer brings vs. what you bring
- Release forms: if anyone besides you is in shots
- Usage expectations: where you’ll post (website, ads, email) so the photographer knows what “quality” means
Once the shoot wraps, don’t just “save the photos.” Plan how you’ll use them. For example: 6–10 images for a homepage refresh, 10–15 for social posts, 2–4 for product pages, and 3–5 BTS images for trust-building content.
8. Optimize Lighting and Framing for Impact
Lighting is the difference between “good” and “wow.” If you can choose, go soft. In my shoots, the best results usually come from window light with diffusion (sheers/softbox) or from a ring light/softbox set to reduce harsh shadows.
Here’s a mini test protocol I use before the real session:
- Lighting angles: test 3 positions (front-lit, 45° side, slightly above eye level)
- Background distance: test 2 distances (about 2 feet behind you and about 6 feet behind you)
- How to evaluate: check skin tone consistency, shadow softness, and whether your background looks clean or cluttered
If your background is too sharp or distracting, move the subject farther forward. If your shadows look heavy, raise the light slightly and diffuse it.
Framing-wise, I keep it simple:
- Rule of thirds for portraits (eyes near upper third line)
- Leave “breathing room” for future text overlays (especially for carousel covers)
- Watch the crop: if you’re posting on mobile, framing that looks fine at full size can get awkward once cropped
Also—keep backgrounds clutter-free. You’d be surprised how often a random cable or random chair ruins an otherwise perfect shot.
9. Plan Your Post-Production Workflow
Post-production can eat your time if you don’t plan it. I like a two-pass workflow: a fast batch pass first, then a refinement pass for hero images.
Pass 1 (10–15 minutes): batch cleanup
- Apply a consistent white balance so skin tones don’t drift across images.
- Adjust exposure/brightness so the face looks natural (not washed out).
- Set a basic contrast and vibrance/saturation level that matches your brand vibe.
- Lightly sharpen and reduce noise if needed (especially for indoor shots).
Pass 2 (hero images only): refine
- Fix distractions (small blemishes, flyaway hairs, lint on clothing)
- Do targeted color correction (make sure your outfit color stays true)
- Check highlights and shadows on the face—this is where “professional” shows up
If you use Lightroom, an easy starting point I often see work well for creator portraits (fine-tune to your camera/lighting):
- Exposure: +0.20 to +0.60
- Contrast: +5 to +15
- Highlights: -10 to -30
- Shadows: +10 to +25
- Vibrance: +10 to +20
- Temperature: adjust until skin looks neutral (not orange/green)
Export settings I recommend:
- Social web: JPEG, 2000–3000px on the long edge, sRGB
- Website use: JPEG, 2500–4000px long edge, sRGB
- Transparent needs (rare): PNG, only if you truly need it
And please don’t over-edit. If the photo looks “edited,” people feel it. Aim for a natural look that still feels polished.
10. Use Your Photos Strategically Across Platforms
Taking great photos is only half the job. The other half is using them in the right formats, with a plan.
Platform crops that actually work
- Instagram Stories / Reels cover: 1080 × 1920 (vertical). Keep important details (face/text space) centered.
- Instagram feed post: 1080 × 1080 (square) or 1080 × 1350 (portrait). For portraits, leave a little headroom so it doesn’t feel cramped.
- X/Twitter: 1600 × 900 for landscape (if you use wide images) or keep it consistent with your theme.
- Website hero: 1920 × 1080 or higher, depending on your site layout.
Simple template guidance (so your feed looks intentional)
If you create templates, you’ll save hours. Here’s a layout I like for carousels:
- Canvas: 1080 × 1350 (portrait)
- Top safe area: 120px reserved for your brand name/logo or title
- Text block: place text in the lower third (about 350–450px tall)
- Background image: keep the subject centered so cropping doesn’t cut faces
For covers, I also recommend using a consistent color for your text box (example: semi-transparent white at 20–30% opacity, or your brand accent color at 10–20% opacity). It keeps everything cohesive without looking “template-y.”
BTS shots: where they fit in your funnel
BTS isn’t just filler. It’s trust content. I usually capture (and later post) these types of BTS:
- Setup shot: camera/lighting in frame, you adjusting your outfit
- Outfit change: quick candid between looks (same location for consistency)
- Editing moment: your laptop screen with the images open (even a simple “before/after” view)
- Product handling: packaging, placing items, or preparing orders
Use BTS early (before a launch) and mid-funnel (when people are deciding if they want to buy or book you). People connect with real process—it makes the brand feel human.
11. Track Results and Use Feedback for Improvement
After you publish, don’t just move on. Look at what performed and why.
My go-to metrics:
- Engagement quality: saves and shares (not just likes)
- Click-through: link clicks from bio/ads
- Comments: what people ask about (“Where did you get that?” “How do I do that?”)
- Website behavior: time on page and CTR on image-heavy sections
If a particular type of photo keeps winning—like workspace shots or close-up product images—add more of that to your next shot list. If something underperforms, don’t blame the algorithm first. Ask: was the image clear? Was it formatted correctly? Did it match the message?
Also, gather direct feedback occasionally. A simple poll in Stories (“Which cover do you like more?”) can tell you what direction to take without guessing.
FAQs
Start with your brand personality and write down a few “anchors” you can repeat—colors, lighting style, wardrobe tone, and what you want people to feel. Then pick the photo types you need (headshots, lifestyle, product shots, BTS) so the shoot stays focused on your message.
Include essential categories like portraits, action/workspace shots, and product or detail close-ups. Prioritize the must-haves, then organize them by scene/location. Sharing the list with your photographer helps everyone move faster and ensures you capture the images you actually need.
Choose 2–3 outfits that match your brand colors and style. I’d keep patterns simple (or avoid them completely), go for solid colors when possible, and pick clothing that makes you feel confident. If you feel good in it, it usually shows up in your posture and expressions.
Bring 2–3 props that support your story—tools, products, or branded items that connect to what you do. Keep everything clean and uncluttered. If a prop doesn’t add meaning (or it distracts), leave it out.