Table of Contents
If you’re trying to film talking head videos alone, you don’t need a whole production team—you need a setup that’s repeatable. I’ve tested a bunch of solo workflows over the last year, and the biggest thing I noticed is this: the “pro look” comes from nailing lighting + audio first, then making your delivery feel natural enough that people trust you.
So here’s my complete, practical guide for filming talking head videos solo in 2026—no crew required, no complicated rig, and no “just be confident” fluff.
⚡ TL;DR – Key Takeaways
- •Film for trust: keep delivery conversational and cut editing down to what’s truly necessary.
- •AI editing tools like Joyspace and Descript help you clean up stumbles fast—without turning your video into a robot read.
- •Lighting + audio are the non-negotiables. When I swapped from harsh overhead light to a softbox/ring-light setup, the difference was immediate.
- •Shorter usually wins: aim for ~60–180 seconds on platforms like Instagram Reels/TikTok, not “under 3 minutes” as a vague rule.
- •Use micro-movements, small props, and subtle on-screen text to keep the frame engaging—without needing B-roll.
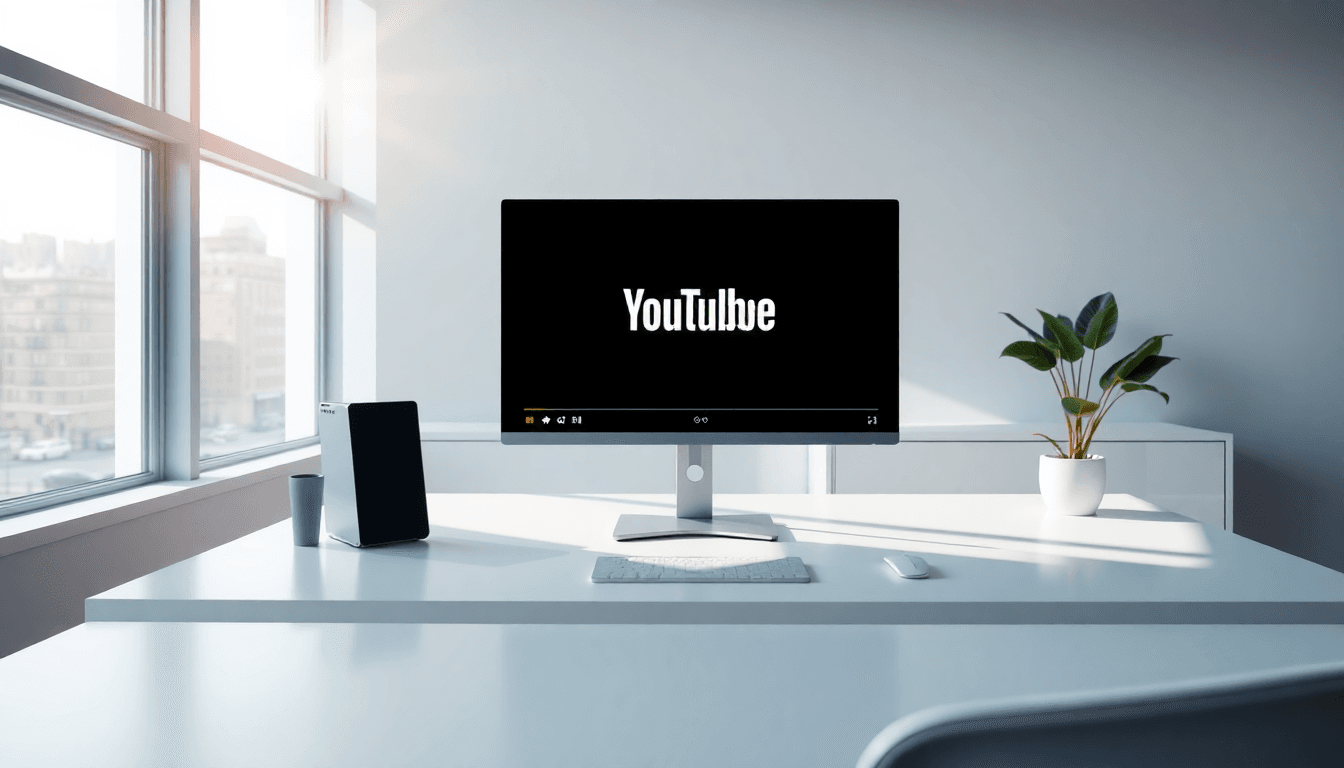
What I Actually Do to Film Talking Head Videos Alone (2026 Setup)
When I film solo, I’m optimizing for one thing: consistency. If my setup takes 30 minutes every time, I won’t film often—and the whole strategy falls apart.
Here’s the workflow I use (and what I’d tell a friend to copy):
- Tripod first. I set the camera/phone on a tripod and lock it in place. No “I’ll just hold it for a second.”
- Light second. I position my key light (or ring light/softbox) so my face is evenly lit and shadows aren’t doing weird things under my eyes.
- Audio third. I test the mic before I hit record. If the room sounds echo-y, I fix it now—not after I’ve recorded 12 minutes.
- Frame + delivery last. Eye level, grid on, simple bullet notes, and I record a couple of imperfect takes.
That’s it. It’s not glamorous, but it works. And in 2026, viewers can tell when your content is “effortless” because you removed friction—not because you have a studio.
Why Authenticity Still Wins (Even With AI Tools)
I’ve noticed that people don’t mind imperfections—they mind inconsistency. A small pause, a word slip, or a breath sounds human. But if your audio crackles or your light looks different every clip, it pulls attention away from your message.
The “anti-edit” trend makes sense, too. For my own talking head videos, I’ll often record 30–60 second takes and only clean up the worst parts. Then I use AI editing to remove filler words or dead air where it clearly hurts clarity.
Quick reality check: if you’re constantly editing every “um” and “uh,” you can accidentally make your voice sound unnatural. The goal isn’t to erase humanity. It’s to remove distractions.
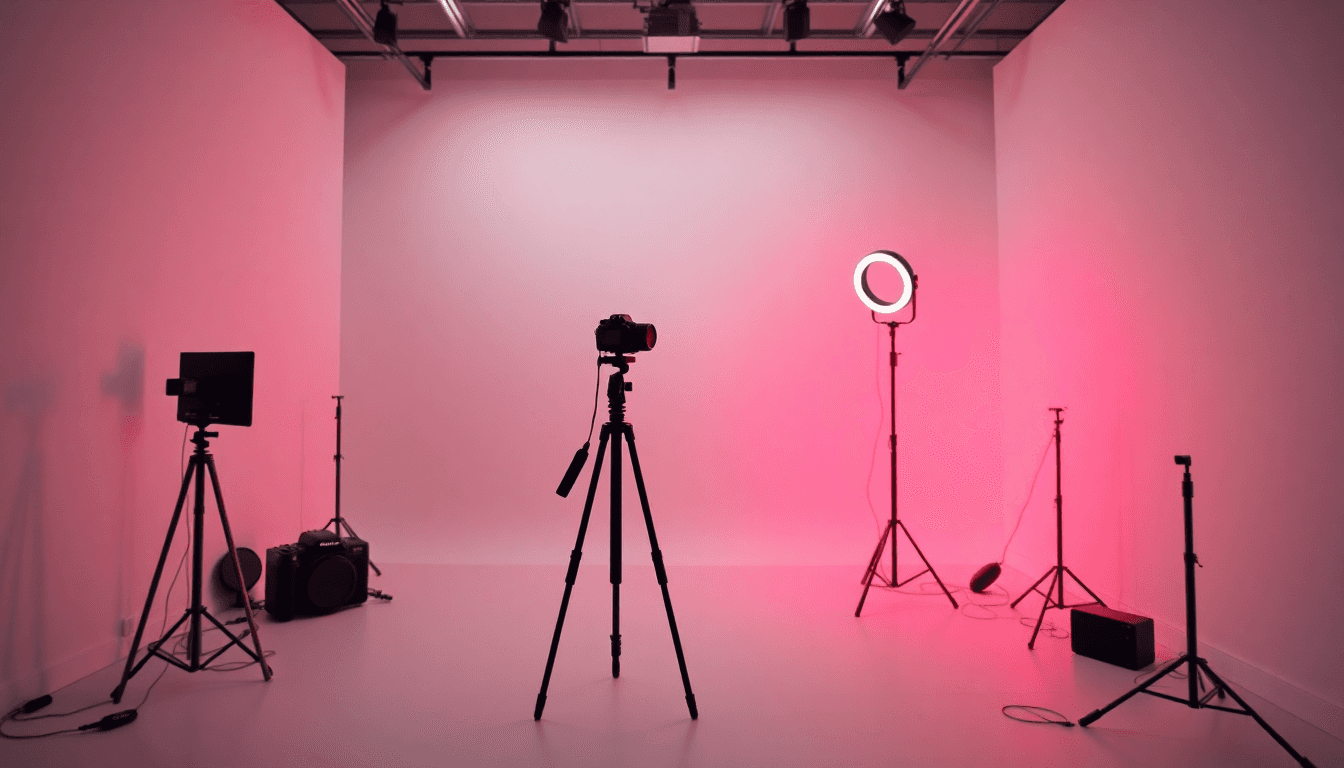
Core Elements for a Professional Solo Look
Lighting: I use Rembrandt-style lighting as a baseline. Key light at about 45 degrees from your face and slightly above eye level. It adds depth without looking like you’re trying too hard.
Audio: This is where solo creators usually lose the plot. Even a great camera won’t save muffled audio. A lavalier like Rode Lavalier GO (or a USB mic like Elgato Wave) plus a quiet room is the combo that makes people stay.
Framing: Eye level is the cheat code. I also keep a comfortable distance—usually 2–3 feet—so you don’t look too far away or like you’re leaning into someone’s personal space.
Motion: Micro-movements matter. Small gestures, slight leaning, and controlled head nods keep the frame alive. Props work great too—one simple item you can hold (a pen, notepad, small card) gives your hands something natural to do.

Camera + Phone Settings That Don’t Fight You
For most solo creators, a modern smartphone is already “good enough.” The real issue isn’t resolution—it’s consistency and focus/exposure changes mid-take.
Here’s what I recommend:
- Tripod everything. If you’re holding the phone, you’re basically guaranteeing micro-shake.
- Use grid lines. Turn on the grid so your eyes land in the right zone (rule of thirds helps).
- Lock focus + exposure. Auto can hunt and shift while you talk. I’d rather have “set it and forget it” than a camera that keeps adjusting.
- Shoot the highest quality you can. If your phone supports 4K, use it. It won’t make the video look automatically better, but it gives you flexibility for cropping and repurposing.
Also, use the back camera if you can—it usually has better optics and stabilization. And if you’re trying to keep motion smooth while you adjust your setup, a stabilizer (like a DJI-style stabilizer) can help, but it’s not required if your framing stays locked.
For more on this, see our guide on talking avatar.
Using Your Smartphone Effectively (My Quick Checklist)
I always do this before recording:
- Clean the lens. Seriously—smudges make everything look softer.
- Highest resolution (usually 4K).
- Manual focus if available. If not, tap to focus on your face and then avoid moving too much.
- Back camera + landscape. It’s easier to repurpose for YouTube/LinkedIn later.
- External mic if possible. Rode Wireless GO or Riverside are popular because they reduce the “hands-free audio” problem.
Lighting Setup for Solo Creators (No Studio Required)
Lighting is the difference between “I recorded in my apartment” and “this looks intentional.” You don’t need a full studio—just a key light that flatters your face and controls shadows.
Two solid options:
- Soft, diffused light (softbox or ring light)
- Window light (best if you can control timing and avoid harsh direct sun)
What I avoid: harsh overhead light. It creates shadows under your eyes and makes you look tired even when you’re not.
Rembrandt Lighting (Simple, Repeatable)
Rembrandt lighting is basically: key light at 45 degrees, slightly above eye level. You should see a small triangle of light on the shadowed cheek. That triangle is what adds depth.
If you’re using a softbox or ring light, diffuse it. If you’re using natural light, stand near a window with indirect sunlight and use a reflector (even a white foam board) to bounce light back into the shadows.
One practical tip: don’t just judge lighting by the “brightness.” Judge it by the shadows under your eyes and around your chin. Those are the tells.
Audio Equipment and Room Fixes That Actually Matter
If your audio is bad, people don’t “forgive it.” They bounce. That’s the blunt truth.
I’ve had videos where the camera looked fine, but the audio had an echo—those always underperformed. So I’m picky about sound.
Mic options I’d trust: a lav like Rode Lavalier GO, or a USB condenser like Elgato Wave. The exact model matters less than placement and room noise.
Room: record in a quiet area. If you can, choose a room with soft furnishings. Curtains, rugs, and foam panels help reduce reflections.
Acoustic-Friendly Environment (My “Do This First” Steps)
- Close windows and doors. Background noise kills clarity.
- Turn off fans. Even “quiet” fans add a constant hiss.
- Do a 10-second sound check. Put on headphones and listen for echo and harshness.
- Mic placement: 6–12 inches from your mouth. Clip-on lavs should sit securely so you don’t bump them while talking.
Also, remember that many platforms default to sound-off viewing. Captions aren’t optional if you want reach and retention. They’re accessibility, and they’re also a retention tool.

Framing, Composition, and How to Keep People Watching
If you’ve ever watched a talking head video where the creator is perfectly still, it feels… heavy. Not because they did anything wrong—because your brain craves visual change.
So I keep the frame clean and add motion in small doses:
- Eye level for a natural connection
- Rule of thirds (eyes near the top third line)
- 2–3 feet distance to avoid distortion
- Micro-movements (gestures, slight leaning, natural head nods)
- Props as “reality anchors” so your hands don’t look lost
Optimal Framing for Talking Head Videos
I keep my face well-lit and centered, with enough headroom so the top of my head isn’t cut off. I use the grid to align myself, then I record a test clip and scrub through it once.
Here’s what I check in the test:
- Is my eye line level with the lens?
- Is my background distracting?
- Do I look slightly too wide/too close (camera distance issue)?
If the background is messy, fix it. Even a simple solid wall or a clean shelf makes you look more professional instantly.
Script + Delivery: How to Sound Natural Without Rambling
My biggest rule: don’t write a “script you read.” Read-scripts sound stiff. Instead, I use bullet points.
Here’s the structure I use:
- Hook (first 3 seconds): a bold claim, quick story, or a surprising stat.
- 3 main points: bullet them, one idea per breath.
- Close: tell them exactly what to do next.
And yes, energy matters. Cameras flatten expressions, so I aim for slightly more enthusiasm than I’d use in a normal conversation. Not fake—just a bit more animated.
Effective Script Preparation (Bullet Points That Work)
Practice aloud with your bullet points. Then record 2–4 takes. The “perfect take” rarely happens on the first try, and that’s fine.
One thing I do that helps a lot: I design my bullets so I can stop mid-sentence and still keep the message coherent. That makes editing faster and keeps the final video tight.
For more on this, see our guide on writing effective headlines.
Editing and Post-Production Techniques (2026 Workflow)
Editing should make your video clearer—not erase your personality.
In 2026, AI tools can speed up the boring parts. Tools like Joyspace.ai, Descript, and CapCut can help remove filler words, dead air, and awkward stumbles. The key is using them like a filter, not like a replacement for your voice.
Here’s a workflow I’ve used successfully:
- Step 1: Import your best take (the one with the best energy).
- Step 2: Run filler/dead-air cleanup using the tool’s “silence detection” or “remove fillers” feature.
- Step 3: Fix only the obvious mistakes (big stumbles, long pauses, repeated phrases).
- Step 4: Add captions and quickly scan for misheard words.
- Step 5: Add subtle visual emphasis (small zooms or text highlights on key lines).
Example: with Joyspace.ai’s silence detection, you can cut dead air and tighten pacing so the video feels “snappy” without turning it into a jump-cut mess.
Visual Enhancements Without Making It Look Edited to Death
I like subtle zooms and on-screen text for emphasis—especially if you’re talking about steps, lists, or numbers. If you’re not sure what to add, keep it simple: highlight one key phrase per section.
And about length: if you go beyond 3 minutes, you need to earn the extra time. I’m not saying “never go long.” I’m saying trim until the video feels like it’s moving. If a section doesn’t add new value, cut it.

Common Problems When You Film Alone (And How to Fix Them Fast)
Solo filming doesn’t fail because of the camera. It fails because of tiny issues you don’t notice until playback.
Here’s a troubleshooting guide based on what I run into most:
- Problem: Audio sounds echo-y
Cause: hard walls/empty room
Fix: add soft furnishings (rug/curtains) and record away from bare walls - Problem: Background looks messy
Cause: clutter or random light sources
Fix: simplify the scene (solid wall works), turn off stray lights that create hotspots - Problem: Video looks shaky
Cause: unstable mount or phone on a surface that vibrates
Fix: use a tripod and don’t touch it during recording - Problem: Focus/exposure shifts mid-take
Cause: auto focus/exposure hunting
Fix: lock focus + exposure and keep your face in the same area
And yes, keeping engagement without B-roll is tricky—but it’s not impossible. I rely on:
- micro-movements and gestures
- props
- on-screen text for key points
- short segments (especially for Reels/TikTok)
Technical Problems: The Quick Fixes
If your footage looks off—like weird frame pacing or unstable angle—check these first:
- Use a stable tripod
- Enable grid lines for alignment
- Confirm resolution and frame rate settings
- Do a 10–20 second test clip and watch it back immediately
If you’re also working on headshot-style assets or related AI tools, you might find our guide on pixelbin headshot generator useful for your broader content workflow.
2026 Trends: What Platforms and Viewers Expect Now
AI editing and cleanup tools are everywhere now. The “winner” isn’t the person with the most effects—it’s the person who ships consistently with clear audio, readable captions, and a delivery that feels human.
Platforms are also still rewarding:
- captions (because many people watch without sound)
- short-form pacing (especially under ~180 seconds for Reels/TikTok)
- hook-driven openings (first 1–3 seconds matter a lot)
I also see creators improving by testing formats quickly—record 3 variations of the same talking head topic, then keep the one with the best retention and rewatch rate.
If you want to explore adjacent approaches to talking content, you can check our guide on Talking Avatar AI Review.
Wrapping It Up: Your Solo Talking Head Video “System”
If you want to film talking head videos alone in 2026, don’t chase complexity. Build a repeatable system: tripod locked, lighting that flatters, mic placed correctly, and a delivery that sounds like you.
Use AI tools only to remove distractions—filler words, dead air, and obvious mistakes—then keep the rest human. Do that consistently and your videos will start looking “pro” even if you’re filming in your living room.
Frequently Asked Questions
How do I film a talking head video alone?
Use a tripod and place your camera/phone at eye level. Get your lighting first (ring light/softbox or a window setup), then record in a quiet space. Use a microphone for audio clarity, and write bullet points (not a full read-script) so your delivery stays natural.
What equipment do I need to film myself?
At minimum: a tripod, a light source (ring light or softbox), a microphone (lav or USB condenser), and your phone or camera. If you want extra help, use a simple prompter or keep bullet notes just off-camera.
How can I improve my lighting for talking head videos?
Use a soft, diffused key light and aim it at about 45 degrees from your face. If you’re using a window, shoot near it during the day and use a reflector to bounce light into shadows. The goal is even facial illumination—not just brighter lighting.
What’s the best way to frame myself on camera?
Keep your eyes aligned with the lens and use the grid to position yourself (rule of thirds helps). Stay about 2–3 feet away, and keep the background simple so your face stays the focus.
How do I get good audio when filming alone?
Choose a mic you can place consistently (lav or USB condenser), position it about 6–12 inches from your mouth, and record in a room with fewer echoes. Do a quick sound check with headphones before you start the real take.
Can I use my phone to film professional talking head videos?
Yes. Most modern phones can shoot in 4K and look great if you use a tripod, lock focus/exposure when possible, and add external audio. Clean the lens, use good lighting, and you’ll be surprised how “studio-ish” it looks.
What if I don’t have a window or my apartment is noisy?
No window is totally workable. Use a softbox or ring light as your key light, then control reflections with curtains and rugs. For noise, turn off fans/AC where you can, record during quieter hours, and keep your mic closer to your mouth to reduce room pickup.
My glasses glare in the light—what should I do?
Angle your key light slightly above and to the side, not straight on. Also try lowering the light intensity or moving it a few inches. If you can, use a soft diffused light rather than a harsh direct beam.
How should I set up a teleprompter when filming solo?
Place the prompter slightly above the lens line so your eyes stay looking near the camera. Use short lines and don’t let the text become a full paragraph wall. Bullet points on a phone/tablet can also work—just keep the text minimal so you’re not “reading” the whole time.
What wardrobe and background colors look best on camera?
Wear solid colors that contrast with your background. If your wall is light, avoid blending tones. If your background is dark, avoid super dark outfits. For background, pick something low-contrast—bookshelves and plants are fine, but clutter and bright patterns can steal attention.