Table of Contents
Recording audio lessons at home doesn’t have to sound “home-made.” I’ve done enough trial runs (and re-dos) to know one thing for sure: if you get the room + mic placement right, your editing time drops a lot—and your students actually stay engaged.
⚡ TL;DR – Key Takeaways
- •Treat the room (at least the reflections). Even cheap panels placed correctly beat “more gear.”
- •Get mic distance and angle right (usually 6–12 inches, slightly above and aimed down). Use a pop filter.
- •Do a 60–90 second test recording before you start. Check levels and listen on earbuds + your phone.
- •Target consistent loudness for speech (I aim around -16 LUFS). It helps your whole course feel “finished.”
- •Editing should fix problems you can’t record your way out of—background noise, tiny level jumps, and harsh sibilance.
How to Record Audio Lessons at Home (2026): My Setup Checklist
Before I record a full lesson, I always do the same quick routine: pick the room, set the mic, run a short test, and only then hit record for real. It sounds slow, but it saves hours later.
Here’s the practical version of “the right setup.” If you do these in order, you’ll avoid most of the classic home-recording problems: boomy low end, echoey rooms, clipping, and that annoying “why does this sound different from episode to episode?” feeling.
Step 1: Choose a quiet room. Look for a space away from street noise and HVAC. I like rooms with less “empty space,” because they tend to reflect less. If you can, record in a closet-sized corner area with soft stuff nearby.
Step 2: Use materials that actually help. Carpet is great, but it’s not magic. What matters more is killing reflections around the mic. Asymmetrical rooms (not a perfect square) usually sound better, and they’re easier to treat than you’d think.
Step 3: Seal the obvious leaks. Weatherstripping around doors and window seals can make a noticeable difference—especially with traffic rumble or neighbor noise. Heavy curtains help too. If you’ve ever recorded and heard “whoosh” every time someone opens a door, you already know why this matters.
Acoustic Treatment for Clearer Audio (What Works in Real Rooms)
Acoustic treatment isn’t about turning your room into a studio bunker. It’s about controlling what bounces back to your microphone.
Absorption panels: Put them at (or near) the first reflection points. The easiest way I’ve found is the “mirror test.” Sit where your head will be during recording, have someone move a mirror along the wall, and wherever you can see the mic in the mirror—that’s usually a first reflection point. A panel there helps a lot.
How thick? For speech, absorption panels around 2–4 inches (5–10 cm) are a solid starting point. Thicker is better for low-mid control, but you don’t need to overbuild right away.
Bass traps: If your room gets boomy (you’ll hear it when you speak a bit louder), bass traps in corners help control low-frequency buildup. Even 4-inch traps placed in at least two corners can improve clarity.
Diffusers (optional): Diffusers can add a more natural tone, but for most home lesson recordings, absorption first usually beats “trying to sound expensive.” If your room is already small and fairly dead, you can skip diffusers and focus on clean speech.

Do a Setup Test First (Seriously—It Prevents Re-records)
I’ve learned this the hard way: you don’t discover most recording issues while you’re already 12 minutes into a lesson. You discover them when you listen back and think, “Wait… why is this echoing?”
So I always record a 60–90 second test using the same mic distance and speaking intensity I’ll use in the real take. Then I listen on:
- Earbuds (quick intelligibility check)
- Phone speaker (does it sound harsh or muffled?)
- Headphones (detail + sibilance check)
If you hear room tone or reverb, move the mic and treat first reflection points before you touch EQ. EQ can reduce problems, but it can’t fully replace proper placement and absorption.
Use Monitoring Tools (And Don’t Ignore Closed-Back Headphones)
Closed-back headphones help because they reduce sound bleed. That matters when you’re speaking loudly or if your mic is sensitive. You want to hear what your mic hears—not what the room sounds like.
I also keep one “reference track” around (a podcast or audiobook I like). When I’m dialing levels, I compare tone and loudness so my lessons don’t jump around from one recording session to the next.
If you’re also converting content into audiobook-style audio later, this approach lines up well with my process for make audiobook workflows.
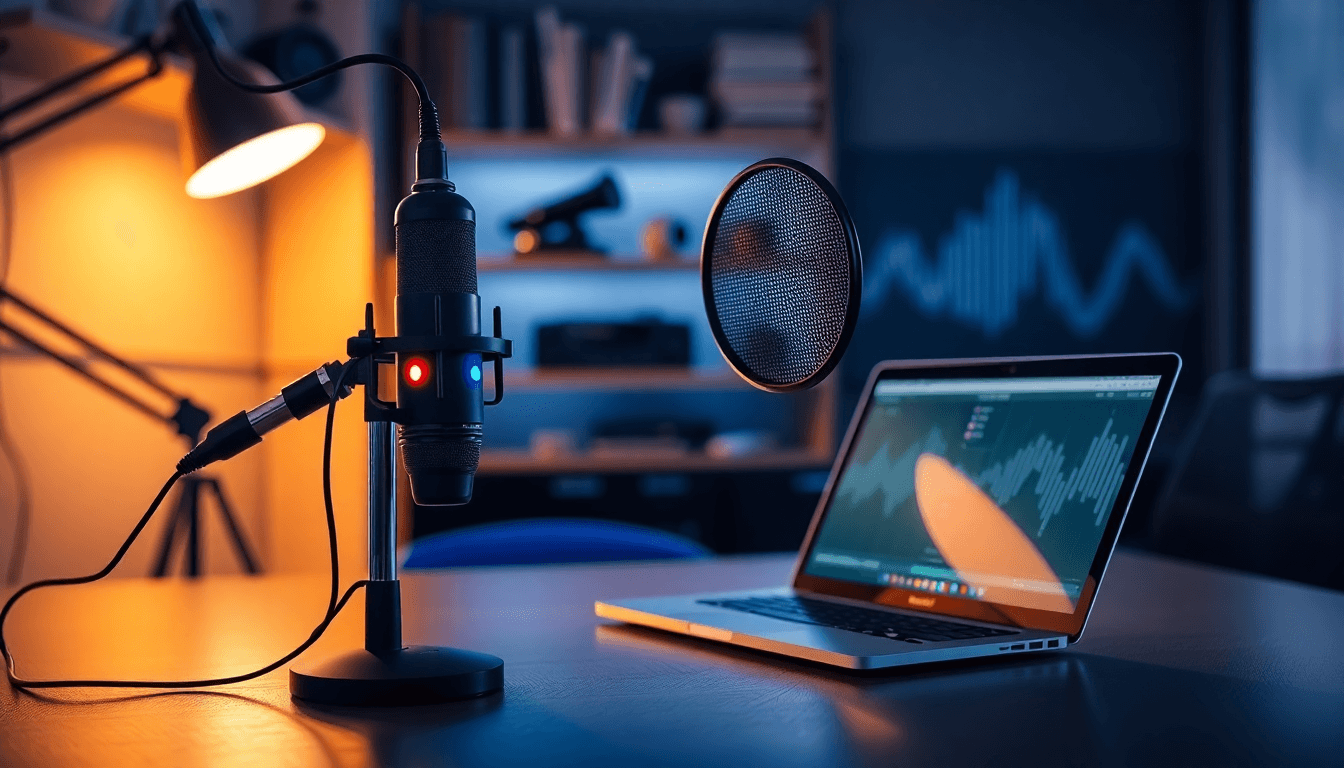
Audio Setup: Microphone, Interface, and Software (With Real Targets)
Let’s talk gear without the hype. For voice-heavy lessons, the microphone matters—but only after the room and placement. In my experience, a decent mic in a treated-ish space beats a fancy mic in a reflective bedroom.
Microphone: Large-diaphragm condenser mics are popular for speech because they capture detail. Dynamic mics can work really well too, especially if your room is noisy or reflective.
Distance: Start around 6–12 inches from your mouth. I aim slightly above the mouth and angle the mic down. That reduces plosives and keeps the voice consistent.
Pop filter: Use one. If you don’t, you’ll end up spending time de-plosiving in editing, and it never looks as clean as a good capture.
Interface: An audio interface handles the mic-to-computer conversion. Look for low latency monitoring and clean preamps. You don’t need “pro” branding—just stable drivers and decent gain.
Cables: Use reliable XLR/USB connections. Loose cables cause crackles and intermittent noise, and it’s the worst kind of problem because it’s inconsistent.
Microphone Selection and Placement (What I Actually Do)
Here’s what I notice immediately when placement is off:
- Too close: bass gets heavy and consonants can sound spitty.
- Too far: you pick up more room and your voice loses presence.
- Wrong angle: plosives and sibilance become harder to fix.
So I keep the distance consistent session to session. If I change the mic position, I re-run the 60–90 second test.
Audio Interface and Cables (Latency + Clean Gain)
When I’m recording lessons, I care about two things from the interface: low latency monitoring and clean gain. If the interface is noisy at low levels, you’ll fight noise reduction later. If the monitoring latency is annoying, you’ll start speaking differently—which changes your levels and makes editing harder.
Recording and Editing Software (Simple Doesn’t Mean Weak)
GarageBand and Audacity are solid for getting started. If you’re on a phone, VoiceMemo can work for quick drafts—just know it’s not ideal for consistent loudness.
For transcription and post-production automation, tools like Rev or Automateed can save time, especially for formatting and turning sessions into publish-ready assets. The goal is simple: clean audio first, then automation for the boring parts.
Recording Your Lesson: Gain Staging, Levels, and Consistency
This is where most people mess up. They either record too hot (clipping) or too quiet (noise floor). I aim for a setup that stays safe and sounds consistent.
Peak levels: Try to keep your speech peaks roughly between -12 dBFS and -6 dBFS. That gives headroom for emphasis and unexpected words.
Why not louder? Because clipping ruins the “professional” part instantly. You can’t EQ your way out of distortion.
Why not quieter? Because low-level recordings amplify background noise when you normalize or compress later. You’ll hear it as hiss or “air” that wasn’t there before.
My quick calibration method: In the test recording, speak at your normal pace and then do your “teaching emphasis” (the part where you get a little louder). Watch your meters. If your peaks hit the red or sound strained, lower gain. If it’s barely moving, raise gain.
If you’re also repurposing content, this “record clean first, edit second” mindset is similar to what I use when building an audiobook generator style pipeline.
Managing External Noise and Interruptions
Noise is one of those problems you can’t fully brute-force in editing without side effects. So I handle it at the source.
- Turn off HVAC, fans, and anything with a steady hum.
- Schedule recordings when neighbors are least likely to be noisy.
- Close windows and move the mic away from doors.
- For temporary isolation, use blankets strategically (not wrapped so tightly that you create weird muffling).
If your environment is consistently noisy, consider an external mic approach like a lavalier mic or shotgun mic—just don’t expect miracles. Placement still matters more than the model name.

Editing and Post-Production: Clean Speech Without Over-Processing
Editing is where your lesson becomes “course-ready.” But the trick is to keep it natural. If you overdo noise reduction, speech starts sounding underwater. If you over-compress, it gets fatiguing fast.
Typical post steps I use:
- Remove obvious noise pauses (silence trimming)
- Reduce background noise gently
- EQ for clarity (usually small moves)
- Level everything so it feels consistent across the lesson
- Add intro/outro (optional, but it helps branding)
Tools like GarageBand or SoundCloud can handle basic cleanup. If you want automation for transcription, formatting, or repetitive adjustments, Rev or Automateed can help you move faster.
Consistency target (speech loudness): When I’m aiming for a polished course, I normalize to around -16 LUFS for spoken word. It’s not a law, but it’s a good target so your audio doesn’t sound too quiet next to other content.
Basic Editing Techniques (The Stuff You’ll Hear Immediately)
When I listen to a lesson and think “this sounds amateur,” it’s usually one of these:
- Background hiss that never goes away
- Uneven volume between sentences or sections
- Harsh “S” sounds that force listeners to turn it down
- Reverb that makes the voice feel distant
So I focus on:
- Noise reduction: Use it lightly. If the “room” sounds robotic, you went too far.
- Normalization/leveling: Make sure the lesson doesn’t jump in loudness when you cut takes.
- Transitions: Smooth cuts are better than hard jumps. If you hear clicks or weird gaps, fix those before publishing.
If you’re also building content that needs consistent release formats, it helps to understand audience listening patterns—this is why I keep an eye on audiobook statistics when planning how long lessons should be and how people consume them.
Using Editing Tools Effectively (Save Time, Keep Quality)
Automation is great when it’s targeted. I like using presets for:
- Noise reduction “baseline” (then I tweak)
- EQ for intelligibility (again, small tweaks)
- Transcription and chapter/segment formatting
One non-negotiable: listen on multiple devices. I check on headphones, phone speakers, and (if possible) a cheap Bluetooth speaker. Compression settings and EQ curves that sound fine on studio monitors can sound off on casual playback.
Device and App Tutorials: Recording Without a Full Studio
You don’t always need a computer setup. For quick lessons, a smartphone can work. I’ve done “draft recordings” this way, then re-recorded only the parts that needed better clarity.
Best practice: Use a decent external mic (like a lavalier) and keep your phone stable on a tripod or stand. Movement causes tiny level changes and makes editing annoying.
Apps like VoiceMemo or Jamworks are simple. They’re fine for getting started—just don’t expect the same consistency as a proper interface.
Recording With Smartphones (Quick + Actually Usable)
If you go mobile:
- Record in a quiet corner (not the middle of the room).
- Keep the phone at mouth height (or slightly above).
- Minimize movement—don’t pace while recording.
- Use an external lavalier mic if you can.
And yes, it’s surprising how much better speech sounds with an external mic—even a basic one—compared to the built-in phone mic.
Using Desktop and Laptop Software (More Control, Less Guesswork)
On a computer, set up your mic, check levels, and do your 60–90 second test. Then record in one or two long takes instead of constantly stopping. You can always edit out mistakes later, but fewer cut points usually means fewer loudness jumps.
GarageBand/Audacity workflows are straightforward: route input correctly, set sample rate and bit depth consistently, and save your session so you can re-export without redoing everything.
Troubleshooting Common Home Recording Problems
Let’s be honest: home recording rarely goes perfectly the first time. The good news is most problems have a clear fix path.
Low audio quality or background noise? Usually it’s mic distance, placement, or gain staging. Start there before you crank noise reduction.
External noise and echoes? That’s room + timing. Seal gaps, treat reflection points, and record when the world is quieter.
If you’re dealing with persistent noise and want an approach that’s more automated, check out mmaudio pro for ideas on how others handle cleanup without spending every night in the editor.
Poor Audio Quality or Background Noise
Try this sequence:
- Move the mic closer by 2–3 inches and re-test.
- Aim the mic slightly down to reduce reflections.
- Lower gain if you’re clipping, raise gain if your waveform is tiny.
- Then apply gentle noise reduction in editing.
External Noise and Echoes
Echo usually means reflections. External noise means the world is loud. So:
- Seal doors/windows and turn off noisy appliances.
- Treat first reflection points (mirror test again if needed).
- Schedule sessions during quieter hours.
- If it’s still bad, consider temporary isolation or a better pickup pattern mic.

Final Tips for Producing Outstanding Audio Lessons
Consistency beats perfection. If you record every lesson with the same mic distance, the same speaking position, and roughly the same loudness target, your course will sound cohesive—even if your room isn’t a professional studio.
A few habits that make a difference:
- Keep a “starting preset” session file in your DAW so every recording begins the same way.
- Do a quick test whenever you change anything (mic position, chair height, room setup).
- Record intros/outros separately if you want them cleaner and easier to re-use.
When you publish, think about delivery. Use formats that stream smoothly and keep quality stable, and add transcripts for accessibility. If your platform supports it, transcripts also help with search and comprehension—students can skim when they’re reviewing.
Wrapping Up: Make Your Home Recordings Sound Like a Course
If you want your audio lessons to sound professional, focus on the boring stuff first: room control, mic placement, and clean levels. Then edit with restraint—fix problems, don’t create new ones.
Once you’ve got a repeatable workflow, tools like Automateed can help with transcription, formatting, and publishing so you spend more time teaching and less time wrestling files.