Table of Contents
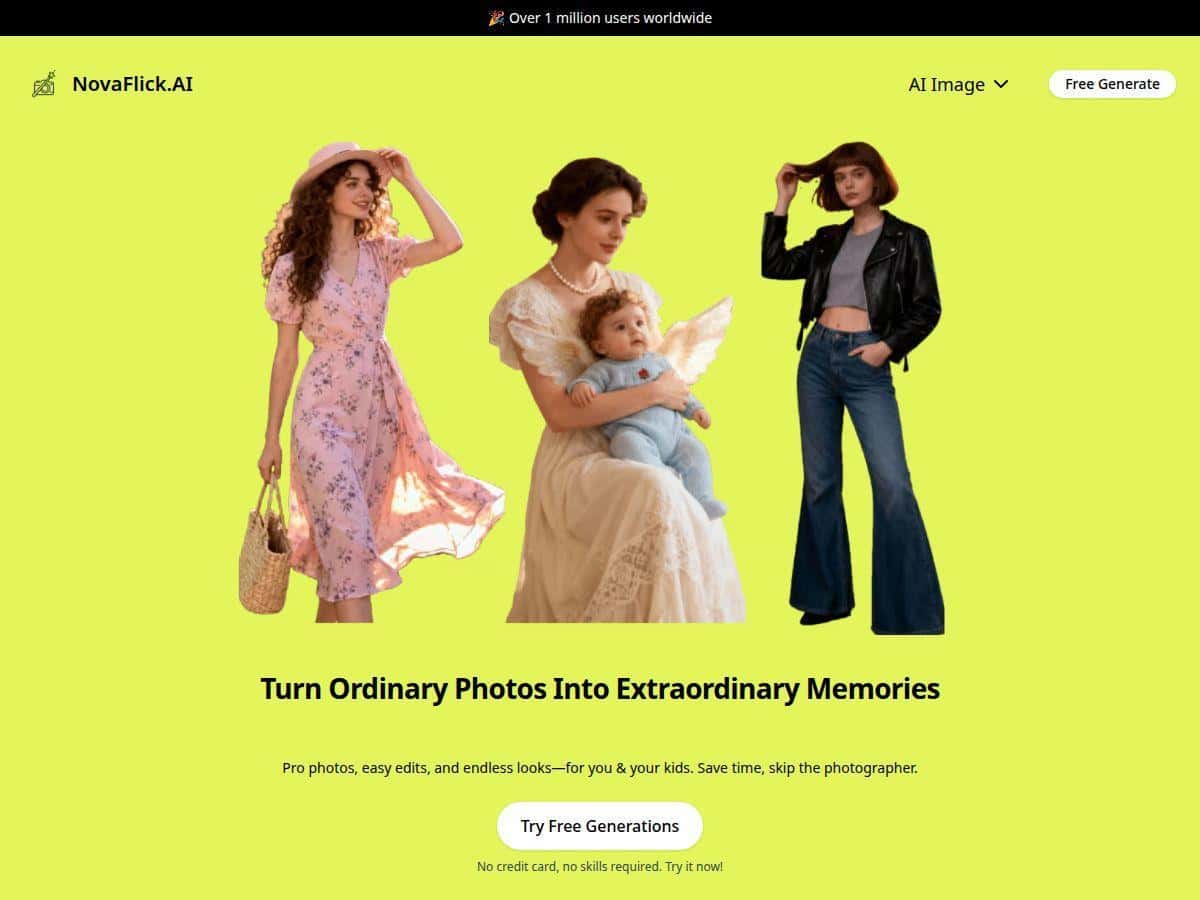
Want your photos to look better without learning Photoshop or spending hours tweaking sliders? I tried NovaFlick (the free AI photo editor) for a couple of weeks, and I’ll be honest: it’s one of those apps that feels almost too simple… until you see the results. I focused on the stuff people actually use—background changes, quick retouching, and the AI portrait enhancement—then stress-tested it with different lighting and backgrounds to see where it holds up and where it starts to fall apart.

NovaFlick Review
Here’s the honest setup: I tested NovaFlick over about 3 weeks, using it on a iPhone 14 (iOS 17.3) and also on a Windows 11 laptop (Chrome 123). I ran 10 test photos—a mix of indoor portraits, daylight selfies, and a couple of tricky backgrounds (busy street scene + a fence line). Then I tried the main tools repeatedly so I could tell the difference between “works once” and “works consistently.”
What I noticed right away: the interface is clean and the workflow is basically “upload → choose tool → wait → export.” There’s no learning curve. If you’re the type of person who wants results fast (and doesn’t want to fight layers), you’ll probably like it.
Performance-wise, most edits felt quick. On my iPhone, single-tool edits (like background removal or portrait enhancement) usually took around 15–45 seconds depending on image size. I didn’t hit any weird crashes, but I did see one failure case: for a photo with very low light + heavy shadows, the portrait enhancer made the face look a bit too smooth and slightly “plastic” compared to the original.
Key Features
-
AI Portrait Tool (selfies → “portrait” look)
I tested this on 4 selfies: 2 daylight shots and 2 indoor shots. Daylight photos came out best—skin looked more even, and the overall contrast felt more “camera-like.” Indoor shots were hit-or-miss. One image improved nicely, but the other turned out over-smoothed around the cheeks and jawline. If you want natural results, use this tool on images with decent lighting and clear facial detail. -
AI Try-On (outfits on your uploaded image)
I tried it with a plain-background photo (simpler edges) and it worked quickly. The outfit placement was convincing at first glance, but when the photo had a slightly angled pose, the fit looked a little off around the shoulders. This is best when your subject is centered and your background isn’t chaotic. -
Photo Editor (quick fixes like blur/blemish touch-ups)
For blur removal, I used a photo taken in motion (background smear, subject slightly soft). NovaFlick sharpened the image, but it didn’t magically restore details that weren’t captured. Think of it like “make it clearer,” not “turn a blurry pic into a DSLR shot.” For blemish correction, it did a good job on small imperfections, though it can reduce texture if you apply it too aggressively. -
Style Transfer (artistic effects)
This one is fun. I ran it on a landscape-style image and got a noticeable stylized look in under a minute. The trade-off: style transfer changes the whole image, so if you want subtle edits, this isn’t the tool. It’s more “pick a vibe” than “fix this one thing.” -
Change Background (replace or enhance the scene)
This is where NovaFlick really shines—especially for simple backgrounds. I tested background removal on 3 images: a plain wall selfie, a garden shot, and a busy street photo. The plain wall one was clean. The garden one had minor edge issues around hair strands. The busy street photo was the least impressive; the app blurred or softened details near the edges instead of doing perfect cutouts. If your background is simple, you’ll be happy. If it’s complex hair + clutter, expect compromises. -
Other tools (object removal + lighting adjustments)
I used object removal on a photo with a small distraction in the corner. It removed the object well, and the background filled in naturally enough for social posts. Lighting adjustments were straightforward—colors looked more balanced, but it won’t match professional color grading control. You’ll get “better,” not “editor-level.”
Pros and Cons
Pros
- Easy for beginners: I didn’t need a tutorial. Most edits are literally a few taps.
- Fast turnaround: on my setup, most single-tool edits landed in the 15–45 second range.
- Great for everyday improvements: background changes, quick retouching, and portrait enhancement are exactly what casual users want.
- Free to start: I tested features without entering payment details, which is a big deal if you’re just trying things out.
- Privacy controls feel more serious than average: I checked the app’s privacy info during setup and noticed it emphasizes that photos aren’t kept indefinitely without permission. That said, I recommend you still review the privacy policy section on the site before uploading anything sensitive.
Cons
- Advanced control is limited: there’s no real layer workflow, no fine masking controls, and no “undo history” like you’d expect from pro tools.
- Edge accuracy depends on the photo: hair and complex backgrounds can come out slightly smeared or softened.
- Generated results can look over-processed: in one low-light portrait, skin smoothing looked a bit too strong.
- Not a replacement for RAW workflows: I didn’t see support for true RAW editing controls (and you won’t get the same export flexibility you’d expect from desktop editors).
- Export quality isn’t “studio”: the results are solid for social media, but you won’t get the same crispness you can achieve with professional tools and careful retouching.
Pricing Plans
NovaFlick has a free plan that gives you access to the main AI tools. In my testing, it was enough to evaluate whether I liked the results and how the edits looked on different types of photos.
If you want more usage or premium features, the paid tier starts at $9.99/month (based on what’s shown on the pricing page at the time I checked). For me, the decision came down to this: if you only need occasional edits for posts or quick portraits, free is fine. If you’re editing regularly (or want more frequent generations), then paying makes sense.
Wrap up
So, should you use NovaFlick? If you want quick, AI-assisted photo edits that don’t require experience, it’s a pretty strong option—especially for portraits with cleaner backgrounds and simple subject photos where edge detection won’t have to fight chaos.
Where I wouldn’t rely on it: complex backgrounds with tricky hair, low-light portraits that need careful, natural retouching, and situations where you need pro-level control (layers, precision masking, RAW-grade editing). But for everyday visuals? It’s fast, easy, and the results are good enough that you’ll actually use it.
If you’re curious, I’d start with one of your easiest photos (plain wall or daylight selfie), test the portrait/background tools, and see if the style matches what you like. If it does, you’re going to get a lot of value out of it.