Table of Contents
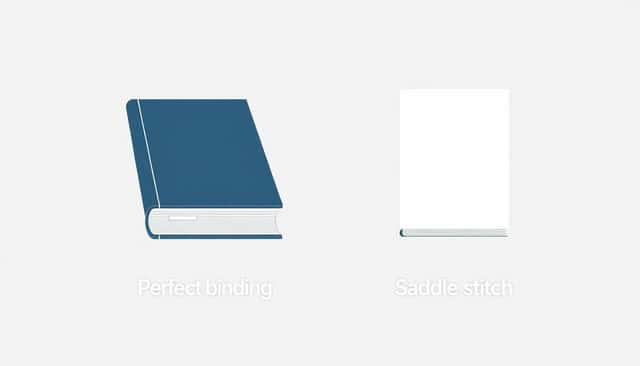
Perfect binding vs saddle stitch sounds like a simple “glue or staples” question—until you’re the one trying to get the book to lay flat, survive handling, and still look good on a shelf. I’ve been there. The right choice usually comes down to your page count, paper thickness, and how hard your readers will be flipping through it.
Below, I’ll compare perfect binding and saddle stitch in a way that actually helps you spec the job. I’ll also tell you what I’ve noticed in real production—like where layflat expectations get messy, and the kinds of failures that show up after a few months.
Key Takeaways
- Perfect binding is the go-to for longer, thicker books (often 40+ pages, depending on paper weight). It uses glue to attach trimmed pages to a spine and can include spine printing—but it usually won’t lay perfectly flat.
- Saddle stitch is best for booklets and magazines with fewer pages (commonly up to 64 pages). It staples through the folded signatures, typically opens flatter, and is usually faster and cheaper for short runs.
- Don’t just think “page count.” Paper thickness (gsm) and binding allowance matter. Thick stock can limit both methods and can make saddle stitch look bulky or cause staple strain.
- Perfect binding failure mode is often glue-line cracking or pages separating over time (especially with heavy paper or rough handling). Saddle stitch failure mode is staple pop or loose binding when the booklet is too thick.
- If your project needs a retail-style spine, choose perfect binding. If your project needs easy browsing (menus, catalogs, workbooks used repeatedly), saddle stitch is usually the better bet.
1. Which Binding Method Fits Your Book: Perfect Binding or Saddle Stitch?
When I’m helping someone decide, I start with one question: How many pages are you actually printing—and what paper are you using? Perfect binding and saddle stitch both get “recommended” at certain page ranges, but those ranges shift a lot depending on paper weight and how thick the book ends up.
Perfect binding is typically the better fit when you want a book-like spine (often with spine printing) and a clean, professional look. It’s commonly used for novels, manuals, and catalogs—especially when you’re beyond the “small booklet” territory. In practice, I usually see it start to make sense around 40 pages, but heavier stock can push that boundary sooner.
Saddle stitch is the classic choice for booklets and magazines. The pages are folded into signatures and stapled through the fold, which is why it can open flat. In many print workflows, saddle stitch is commonly used up to around 64 pages (again, depending on paper thickness and how your printer calculates binding allowance).
About the “opens flat” part: saddle stitch can open much flatter when the booklet isn’t too thick and when the printer can keep enough room at the spine. If you push saddle stitch too far—like using thick paper or trying to exceed what the signatures can comfortably hold—the spine starts to fight back, and layflat becomes less impressive.
2. Understanding Perfect Binding and Saddle Stitch
Perfect binding is glue-first. The printer trims the pages, applies adhesive along the spine edge, and then attaches the cover so the wrap and spine look cohesive. What you get is a clean spine area that can take title and branding—which is a big reason perfect binding is popular for retail-style softcovers.
In my experience, perfect binding quality comes down to the glue line and how well the book “holds” after trimming. If the glue line is too thin, or the paper is too heavy for the setup, you can see the first signs of wear at the spine—especially after repeated opening.
Saddle stitch is signature-first. You fold printed sheets into sections, then staple along the fold line. Because the fold is the spine, the booklet naturally opens more easily. That’s why it’s so common for brochures, programs, and magazines.
It’s also why saddle stitch is usually faster for smaller projects. If you’re trying to get something out quickly, it’s often the simplest route—assuming your page count and paper thickness are within the printer’s comfortable range. (Source reference retained from the original content: https://automateed.com/how-to-publish-a-graphic-novel/.)
3. Main Differences Between Perfect Binding and Saddle Stitch
Here’s the head-to-head in plain terms:
- Spine look: Perfect binding usually gives you a true, printable spine. Saddle stitch typically doesn’t—your staples sit at the fold, so you don’t get the same “book on a shelf” spine effect.
- Layflat: Saddle stitch often lays flatter because the spine is the fold. Perfect binding usually doesn’t lay fully flat, because the glue and trimmed edge create a stiffer hinge.
- Durability: Perfect binding can be durable, but it relies on glue performance and good paper selection. Saddle stitch can be durable too, but staples have their own limits (especially with thick stock).
- Cost + speed: Saddle stitch is often cheaper and faster for shorter runs. Perfect binding can cost more, mainly due to materials and setup, but it can win on longer-run economics.
One tradeoff I’ve seen repeatedly: with perfect binding, the book can look great on day one and then show glue-line stress after time—especially if readers bend it hard or if the paper is heavy. With saddle stitch, the risk is more about the spine and staples: overstuff a saddle-stitched booklet and you can get staple pop, loose signatures, or pages that don’t stay aligned.
The “best use” guidance from the original article is directionally right, but I like to make it more concrete: if you’re planning a menu, catalog, or anything that gets opened repeatedly, saddle stitch is often the better everyday experience. If you’re planning a manual or retail softcover, perfect binding is usually the more polished finish. (Source reference retained from the original content: https://automateed.com/short-author-bio-examples/.)
4. Choosing Perfect Binding: Best Uses and Benefits
I’d pick perfect binding when you want your project to feel like a “real book,” not a stapled booklet. It’s a great fit for:
- Retail-style softcovers (novels, business books, workbooks)
- Manuals and guides where the spine should look intentional
- Catalogs when you want a clean wrap and a more traditional spine presentation
- Longer projects where saddle stitch starts to get thick or awkward
One thing people don’t always anticipate: perfect binding thickness still matters. If your cover wrap and spine width aren’t planned, the spine can end up looking too narrow for readable title text—or too wide if you’re trying to cram in extra pages.
Finishing compatibility is another reason perfect binding is popular. You can usually do soft touch, matte or gloss lamination, spot UV, and other cover finishes. Just remember: heavy coatings can slightly change how the cover behaves at the spine over time.
Pricing: perfect binding can be more expensive upfront, but it’s not automatically “worse value.” In real quotes, the cost drivers are usually setup, materials (cover stock + adhesive + binding materials), and spine width (more pages = more thickness = more material). For example, a small run might feel steep, but as you increase quantity, the per-unit cost often drops because setup is spread across more copies.
If you want the spine branding and a durable, finished look, perfect binding is often worth it. (Source reference retained from the original content: https://automateed.com/what-are-low-content-books/.)
5. Choosing Saddle Stitch: Best Uses and Benefits
If you want quick turnaround and low cost without sacrificing the “nice browsing experience,” saddle stitch is hard to beat. It’s especially good for:
- Brochures and flyers that people actually flip through
- Programs, event guides, and handouts
- Short magazines and newsletters
- Booklets that you expect to distribute widely
In terms of practical limits, saddle stitch is commonly used for 8 to 64 pages, but I always tell people to think in “signatures” too. Saddle-stitched books are built from folded sections, and printers often prefer page counts that divide cleanly into signatures.
The layflat benefit is real—especially for menus and catalogs. But it’s not magic. If you choose very thick paper (like heavy coated stocks), the fold becomes stiffer and the book won’t open as smoothly as you’d expect from a thinner interior.
Pricing-wise, saddle stitch often wins on small quantities because the process is simpler and faster. For example, if you’re printing a 24–32 page booklet for an event, saddle stitch quotes usually land noticeably lower than perfect binding. The tradeoff is long-term “book feel”: saddle-stitched booklets can be durable, but they’re not the same as a glued spine softcover.
Just don’t push it into “thick booklet” territory. Staples have limits, and when you exceed them, you can get misalignment or staple stress. (Source reference retained from the original content: https://automateed.com/how-to-be-a-beta-reader/.)
Quick real-world scenario (what I’d do): Let’s say you’re producing 1,000 copies of a 32-page event brochure on 100–130 gsm coated stock. I’d typically spec saddle stitch because it’s quick, easy to distribute, and it lays flatter when people read it standing in line. If you were doing the same thing as a “brand book” that needs a spine, I’d switch to perfect binding.
6. Factors to Consider When Picking a Binding Method
Page count is only the starting point. When I’m choosing between perfect binding and saddle stitch, these are the factors that actually change the outcome:
1) Paper weight (gsm) and stiffness
A 32-page booklet on 80 gsm feels totally different than the same 32 pages on 170 gsm. Heavier paper increases bulk and can reduce layflat quality for saddle stitch.
2) Binding allowance + spine width
Perfect binding needs enough spine area for the glue and cover wrap to look right. Saddle stitch needs room so the fold doesn’t get overly tight.
3) How the book will be used
If readers will open it flat and reference it often (like a training manual or menu), layflat matters more than “pretty spine.” If it’s mostly display and occasional reading, perfect binding can be a better fit.
4) Likely failure modes
Here’s what I’d watch for in samples:
- Perfect binding: glue-line cracking, pages starting to separate near the spine, or the cover not aligning cleanly after trimming.
- Saddle stitch: staples popping, misaligned pages, or the booklet getting too stiff to open comfortably.
5) Finish and cover options
Perfect binding generally supports a wider range of spine-friendly cover treatments (since you have a true spine area). Saddle stitch can still be finished beautifully, but your cover choices and how the spine fold behaves matter more.
6) Run size and cost drivers
Perfect binding often has higher per-unit costs for small runs because materials and setup are heavier. Saddle stitch is frequently cheaper for short runs. But if you’re doing a large quantity, perfect binding can become more cost-effective per copy because setup is spread out and the unit economics improve.
Quick real-world scenario (what I noticed): I once compared quotes for a 72-page workbook. The client wanted it to feel sturdy and look “premium.” Saddle stitch was technically tempting for the layflat, but the paper was fairly thick and the booklet felt bulky. Perfect binding came in higher per copy, but the final product handled better (no staple stress, and the spine looked clean with readable title text).
7. Final Tips: How to Match Your Project Goals With the Right Binding Type
Here’s the decision checklist I actually use:
- If you need a printable spine for branding, choose perfect binding.
- If you need easy browsing and a flatter opening, choose saddle stitch.
- If your paper is very thick, saddle stitch may start to feel stiff and perfect binding may be safer (depending on your printer’s specs).
- If durability is a priority and the book will be handled often, ask about glue type (perfect binding) or staple spec and paper limits (saddle stitch).
And yes—ask your printer questions. Don’t guess. A good print shop will answer quickly because they’ve seen what breaks.
Questions to ask your printer (copy/paste these):
- What paper gsm and page count are within your recommended limits for saddle stitch?
- For perfect binding, what spine width will my page count and paper weight create—and is that enough for a readable spine title?
- What binding allowance do you need in the layout (so nothing gets cut off near the spine)?
- Can you show me a sample of a similar job, especially one using the same paper weight?
- What’s the most common issue you see with this binding type—glue cracking or staple pop—and how do you prevent it?
- What’s the turnaround time for this binding method at my print run size?
One more thing: if you’re trying to plan around availability, don’t assume every printer offers every binding option at every spec. Saddle stitch machines are widely used, but your quote depends on the shop’s equipment and workload.
FAQs
For thicker books, perfect binding is usually the better choice. Saddle stitch can handle some thickness, but once the signatures get too bulky (often driven by page count and paper gsm), staples can start to struggle. Perfect binding is designed for that “more book-like” thickness and can also support a printed spine.
Perfect binding glues trimmed page edges to a spine and attaches a wraparound cover. Saddle stitch folds sheets and staples them along the fold, creating a booklet. That fold is also why saddle stitch often opens flatter.
For brochures and many catalogs, saddle stitch is often the best fit—especially when you want quick production and a booklet that opens easily while people browse. If your catalog is much longer and you want a more traditional spine-and-cover presentation, perfect binding may be the better choice.